Technical Data Sheet
| Version | 1.2.3 |
| Company | FLOA BANK |
| Author | FLOA BANK |
| Date | 20/12/2023 |
| Platform | Prestashop from 1.6.1 to 8 |
| Licence | Commercial |
| Change Log | [+] Graphic design : highlight basket / product / order tunnel [+] Back office option : display or not the highlight [*] Bugfixes |
Installation of the module
Requirements :
- PrestaShop version from 1.6.1 to 8
- CURL-PHP extension installed
- JSON-PHP extension installed
- OpenSSL extension version 1.0.1 or above installed
- PHP 5.6 or above
- A dedicated and not shared IP
- Your IP must have a good reputation on this website : https://www.brightcloud.com/tools/url-ip-lookup.php . If not, you can request a change using the form.
- Our module is not compatible with the module OnePageCheckout
In order to avoid the loss of the user session while returning to your website after the payment, we recommend to configure cookies in SameSite = None on your server.
Example of line to put in the .htaccess (Above #startDo not remove this comment ...) :
Header always edit Set-Cookie (.*) "$1; SameSite=None; Secure"
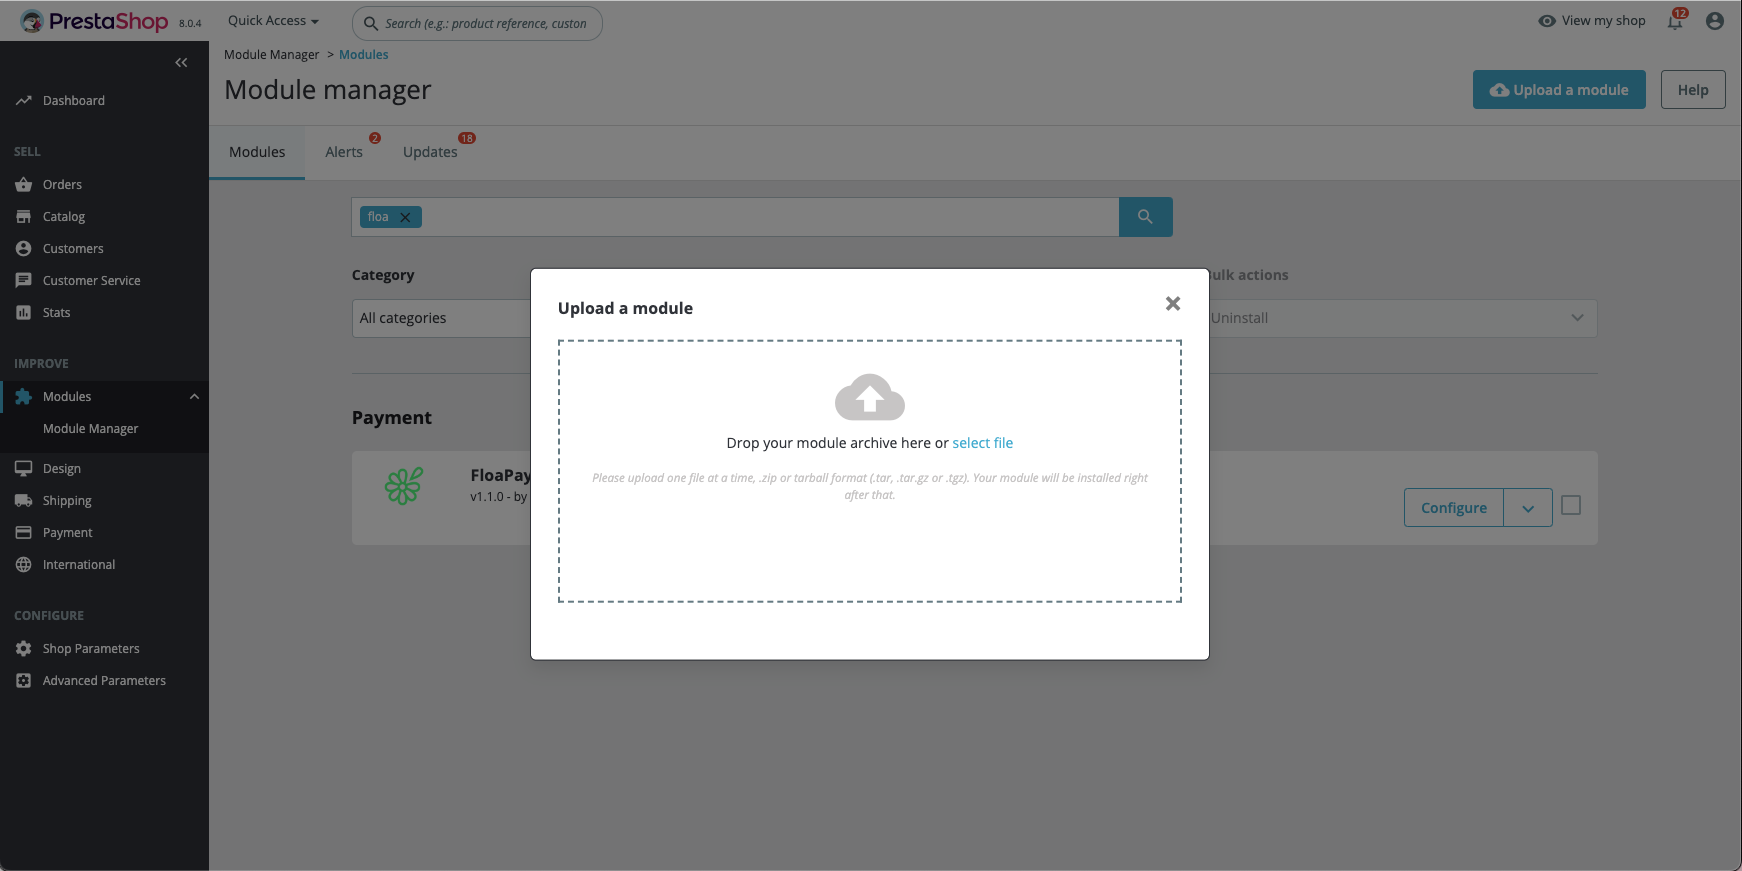
You can download the module directly from the link below to get the latest version.
In your Prestashop back office, import the module via Modules > Module managers > Install a module, to launch the installation.
Module configuration
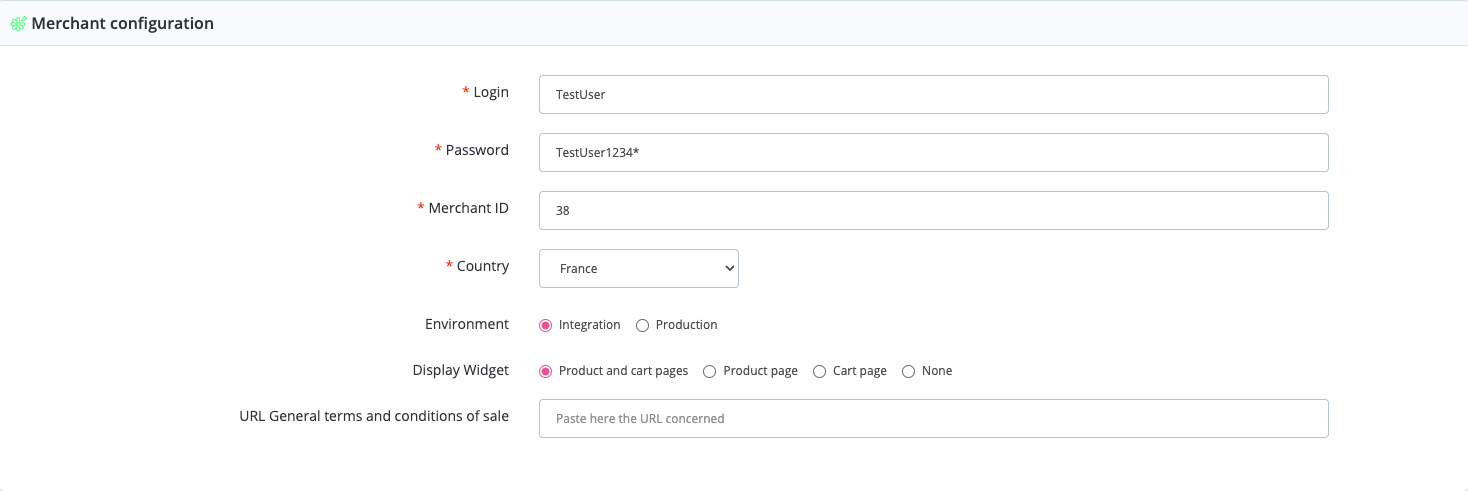
- First, you need to set up your merchant account: login, password, merchant code (also called merchant ID) and store country.
- Next, select the environment you wish to connect to.
• Integration: for testing before putting the solution into production
• Production: for your FLOA production space - You can activate the FLOA highlight on your merchant site. You can choose to display this widget on your product and/or shopping cart pages. The widget bar informs your customers about the FLOA payment method available and offers a reassurance pop-in that describes the FLOA payment method with payment schedule simulation that updates according to the customer's choices.
NB : refer to customer journey in order to see the display. - Configuration of your payment methods
Depending on the FLOA options you have subscribed to, you can configure up to 4 payment methods:
- PayLater payment

To go live, you simply need to change the Activate setting to Yes and enter your Shop Code (also known as Merchant Site ID), then choose your deferral type.
Pay later : France
For deferred payment, you must choose the type of deferral:
• Client: Client chooses deferral period up to 30 days
• Fixed: You can set the delay up to 30 daysNb : client deferred payment is only available for France
Pay later : Italy
You can set the delay at 30 days
Pay later: Portugal, Spain, Belgium
You can set the delay at 14 days or 30 days.
- Payment in 3 instalments

To go live, you simply need to change the Activate setting to Yes and enter your Shop Code (also called Merchant Site ID).
- Payment in 4 instalments

To go live, you simply need to change the Activate setting to Yes and enter your Shop Code (also called Merchant Site ID).
- Payment in 10 instalments (also called CCL)

To go live, you simply need to change the Activate setting to Yes and enter your Shop Code (also called Merchant Site ID).
Order management
When an order is placed with the FLOA module, you will find information concerning the payment, the customer's payment schedule, and actions that can be carried out on it in the details of your PrestaShop order.
- Capturing payments
If your account is configured to manual payment, you choose when you want the customer to be charged (you must, however, respect a maximum delay of 6 days, otherwise, the pre-authorisation from the customer's bank at the time of payment will have expired, in which case the payment is no longer guaranteed).

To do this, simply click on Capture Order in your FLOA account area.
A confirmation message will be displayed to inform you that the capture was successfully processed.
- Refunds
You can, if you wish, make refunds on your FLOA order directly from your PrestaShop BackOffice.
Simply enter the amount to be refunded and click on Refund.
A confirmation message will be displayed to inform you that the refund was successfully processed.
You can cancel fully or partially the order.
The customer journey
Once your FLOA payment solution is correctly configured and activated, your payment methods will appear directly on your shop as follows :
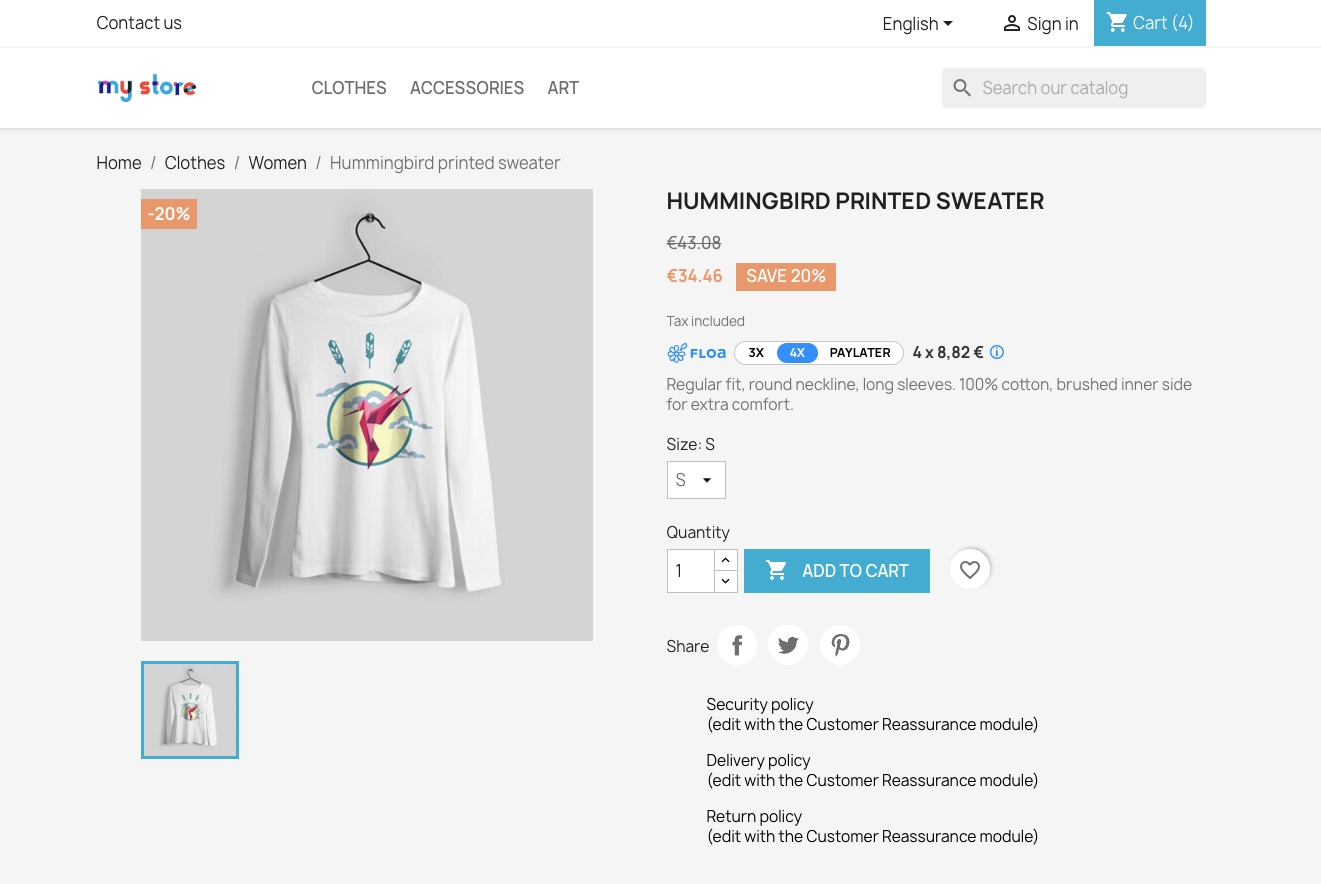
Widget displayed on product page
If the option is activated in the back-office, the display of the widget on product page :
- Example of a product page with FLOA widget integrated :
- Example of the reassurance pop-in when you click on the (i) :
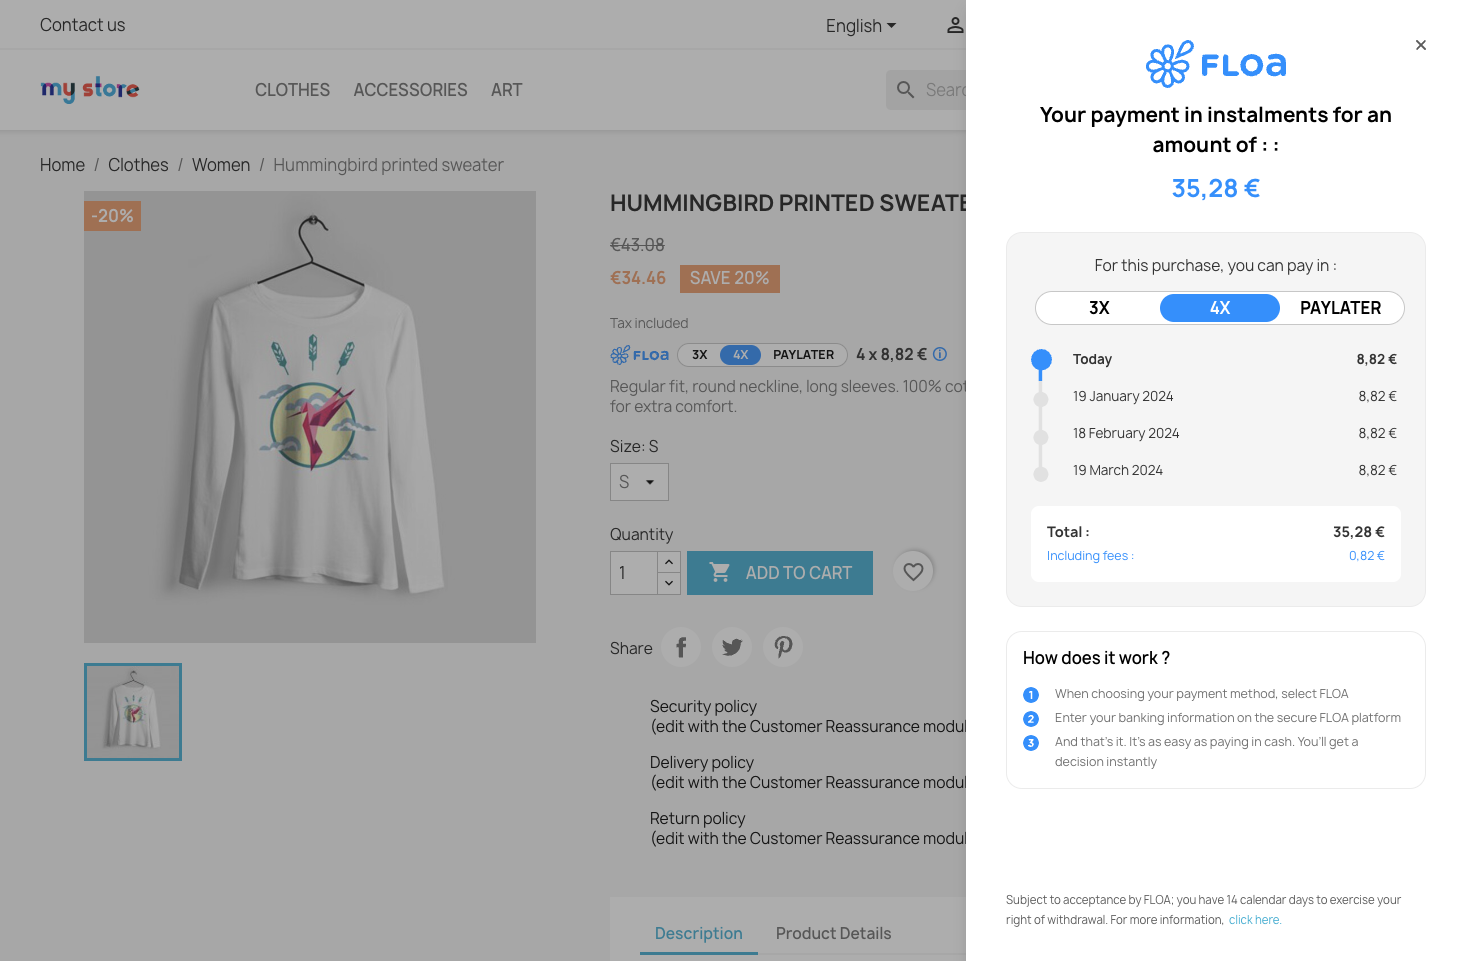
Pricing simulation rules : Based on the product price and quantity, set by the customer
Widget displayed on cart page :
If the option is activated in the back-office, the display of the widget on cart page :
- Example of a cart page with FLOA widget integrated
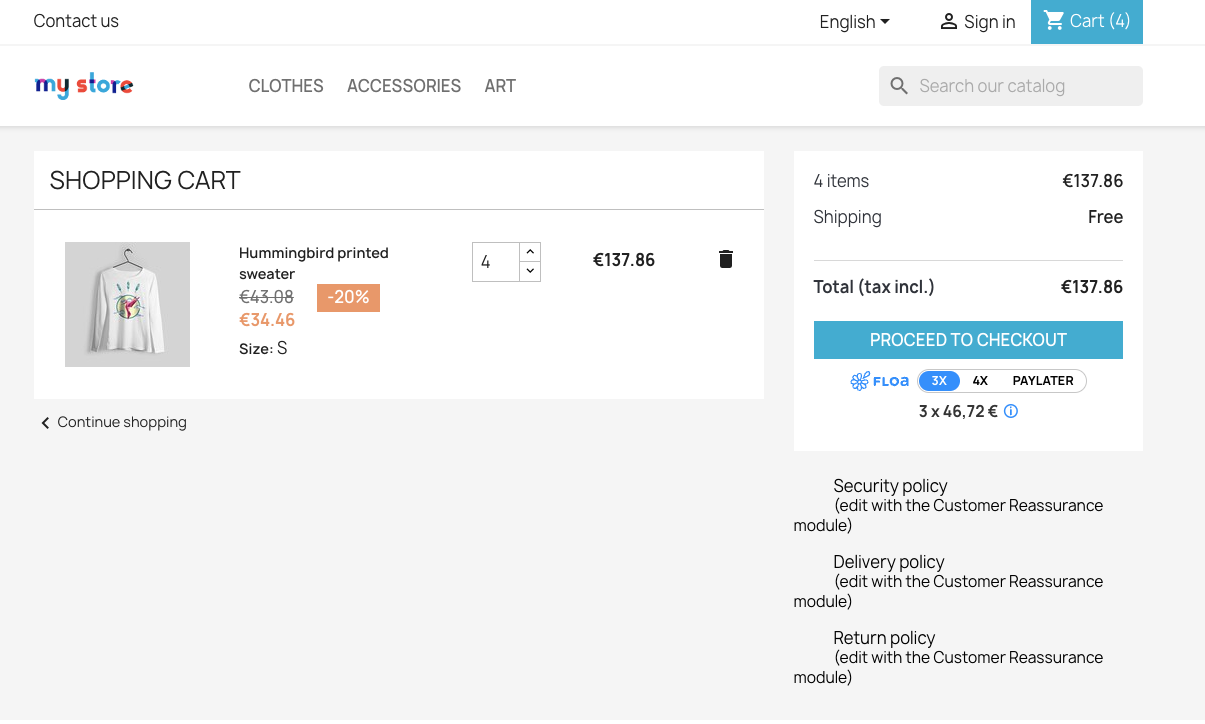
- Example of the reassurance pop-in when you click on the (i)
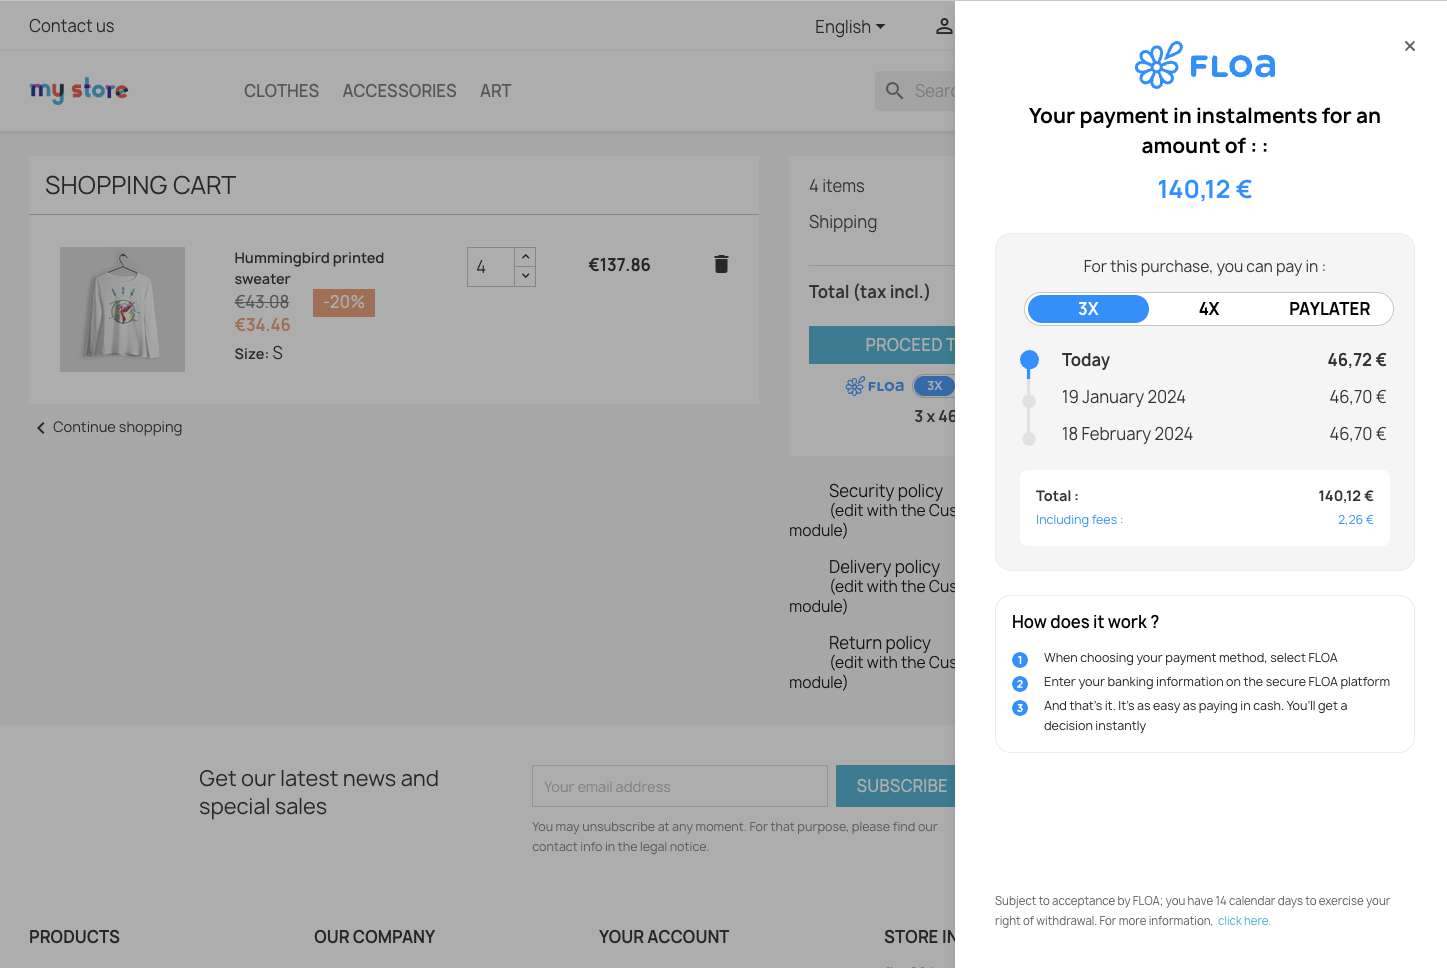
Pricing simulation rules : Based on the total of the customer basket.
Order tunnel
By selecting one of the available FLOA methods, the customer will be asked to fill in their details in order to finalise their eligibility test for the payment method :

Once the information has been approved, the customer is taken to the payment page where they are asked to enter their bank details :

After entering their bank details, the customer is redirected to the merchant site with an order confirmation message :

Silent notification
If the customer closes the payment page immediately after the banking information has been approved, a silent notification is sent to the merchant site to allow the creation of the order related to this transaction.
This is sent every 5 minutes, up to 5 times or until the merchant acknowledges it.